
To manage staged users, navigate to the Staged Users page by opening the Admin Panel’s page selector and selecting Staged Users.
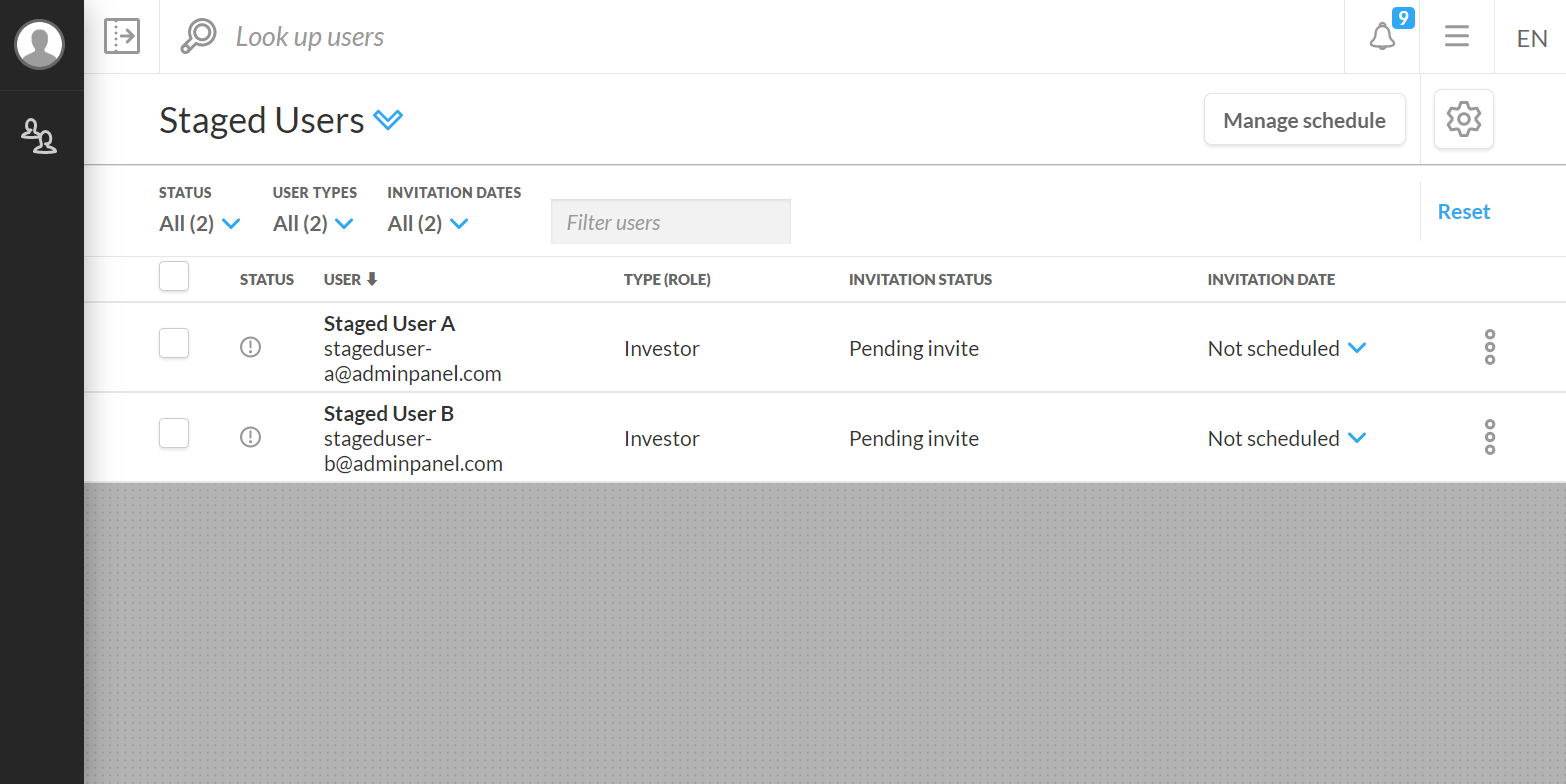
Users in the staged users table are listed in alphabetical order by their last name.
Filtering the list of staged users
You can filter staged users according to the following fields:
-
Status
-
All
-
Pending invite
-
Scheduled
-
Invited
-
Invite expired
-
Invite bounced
-
Invite failed
-
-
User Types
-
All
-
Investor
-
Staff
-
-
Invitation Dates
-
All
-
Not Scheduled
-
Any upcoming invitation dates
-
-
Keyword filter
A checkbox is available on the first column of the table. You can click a checkbox to select users for immediate invitation emails. To do this :
-
Click a checkbox next to the user(s) you want to select
-
Click Send Invite in the toolbar
How to add and edit invitation schedules
Select Manage schedule to open the Manage Schedule modal. Here, you can add, edit, and delete schedules for sending invitation emails to staged users.
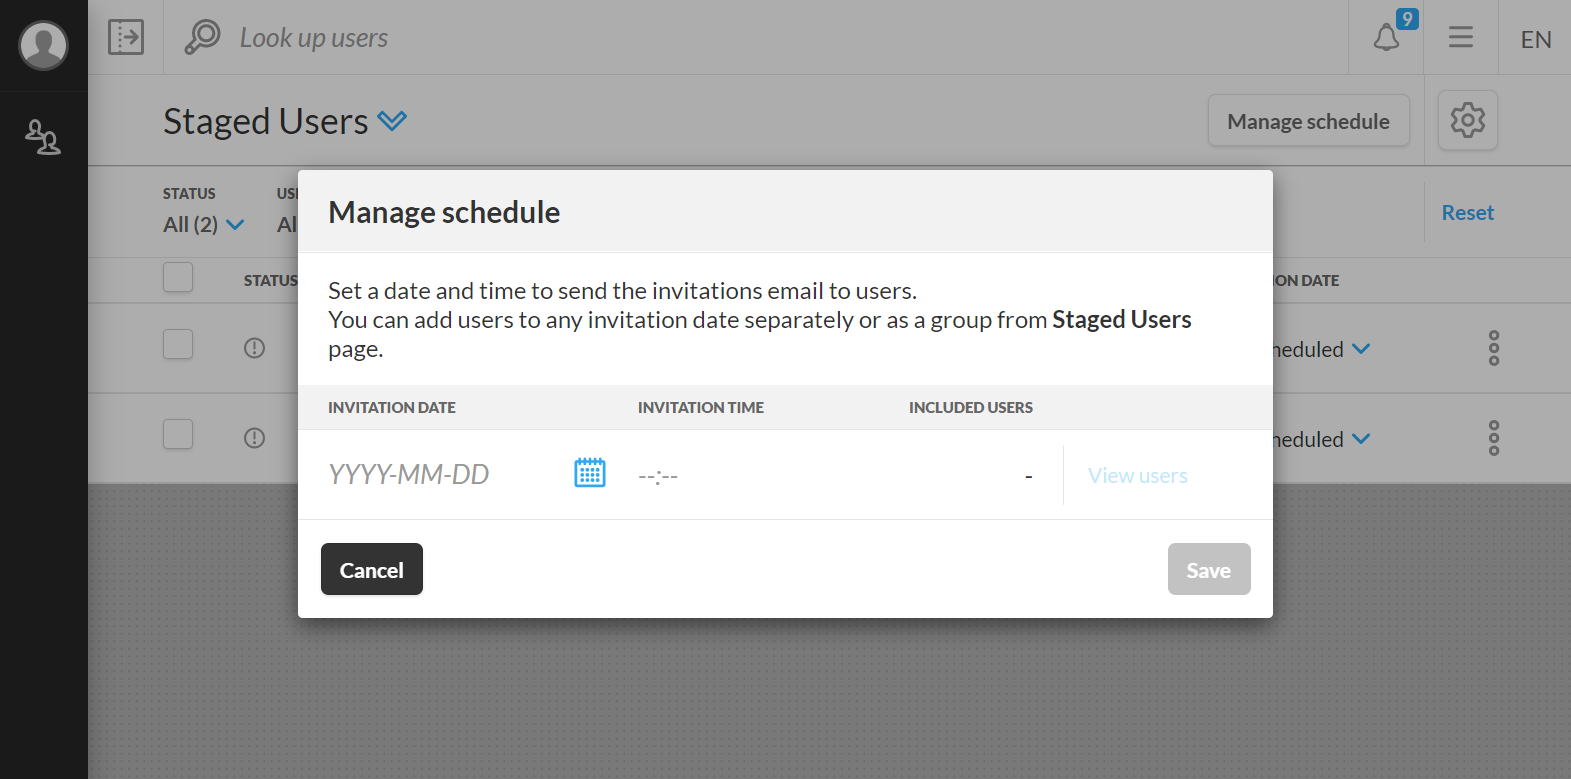
Schedules will appear in the order of their occurrence (earliest to latest), and will display the following information:
-
Invitation Date - the date when the email will be sent
-
Invitation Time - time when the email will be sent (displayed in 24-hour format)
-
Included Users - number of users who will be sent an invitation email on the scheduled date/time
-
You can click View users to be redirected to a page listing only staged users for the scheduled date/time
-
Adding a schedule
-
Enter an invitation date by either:
-
Manually entering an invitation date in the YYYY-MM-DD field
-
Selecting a date from the calendar by clicking the calendar icon
-
-
Enter an invitation time in a 24-hour format.
-
Select Save.
Editing a schedule
Schedules can be easily edited by changing the fields of existing schedules. Simply click, edit, and remember to click Save to keep any changes you've made before closing the modal.
Deleting a schedule
Deleting a schedule can be done by clicking the red x on the far right-hand side of the column for the schedule. Schedules will disappear from the modal but are not deleted until you click Save.