Organize any users you frequently manage together into user sets. User sets let you find users that have shared characteristics in a single motion and simplify tasks like publishing to a group of investors.
In Publishing, you can publish a document to a user set instead of selecting each user. See Published Documents.
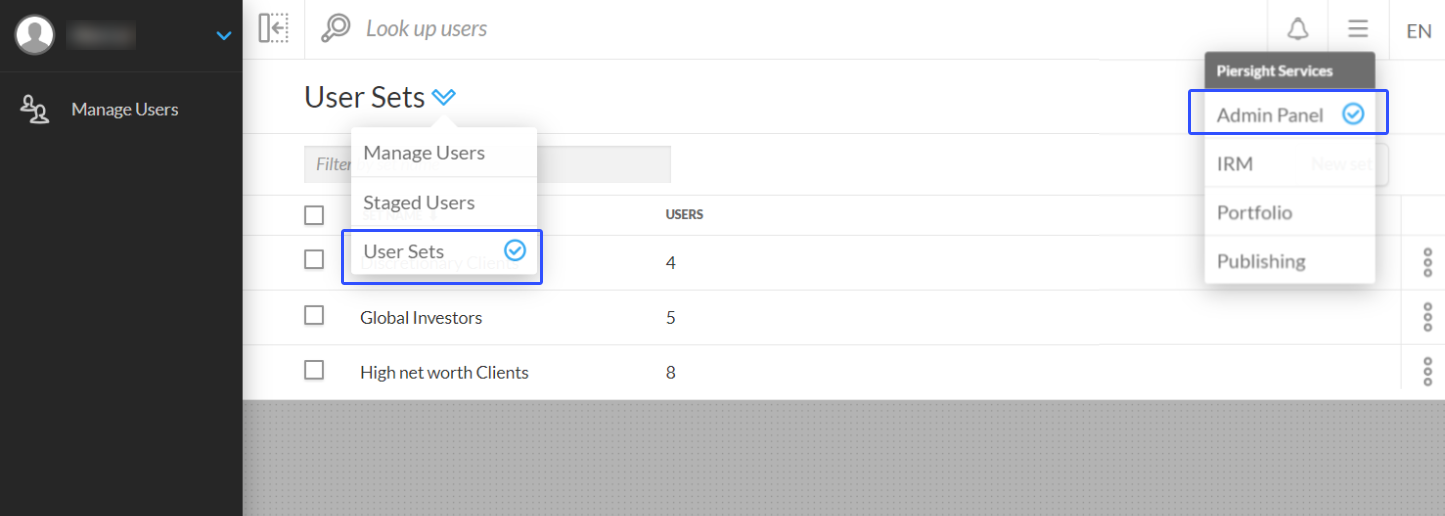
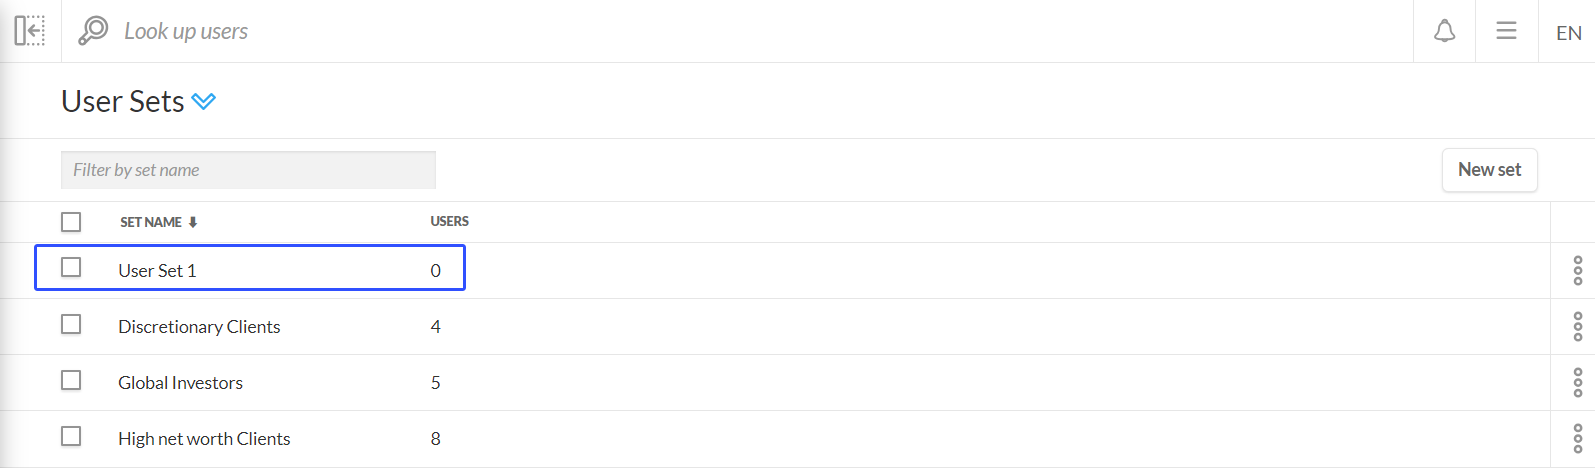
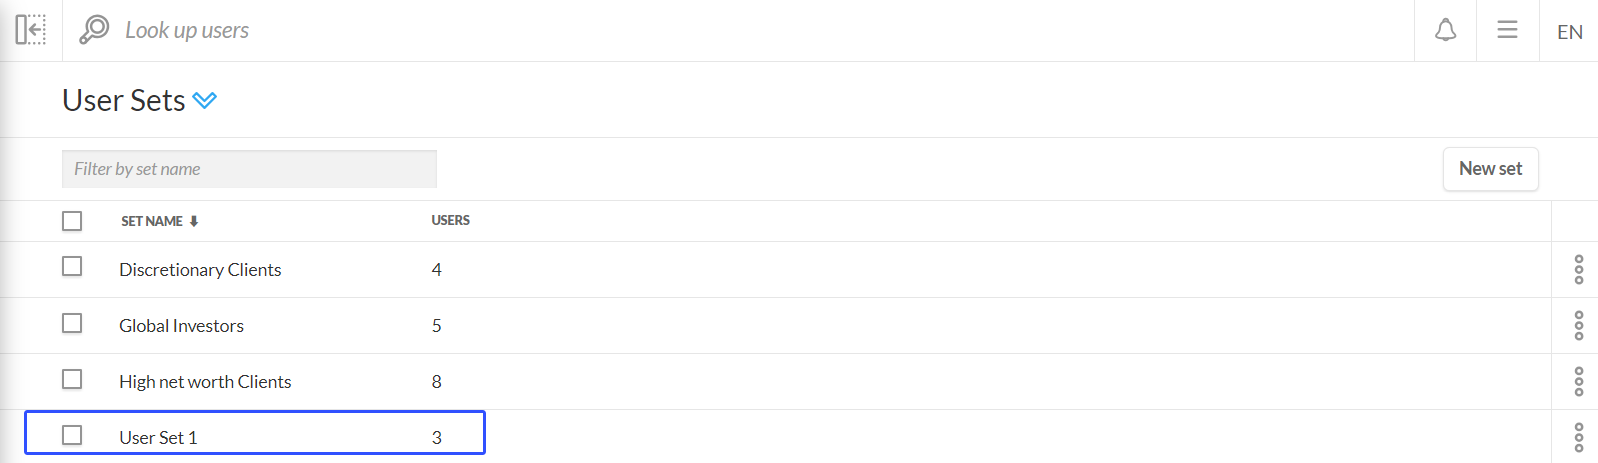
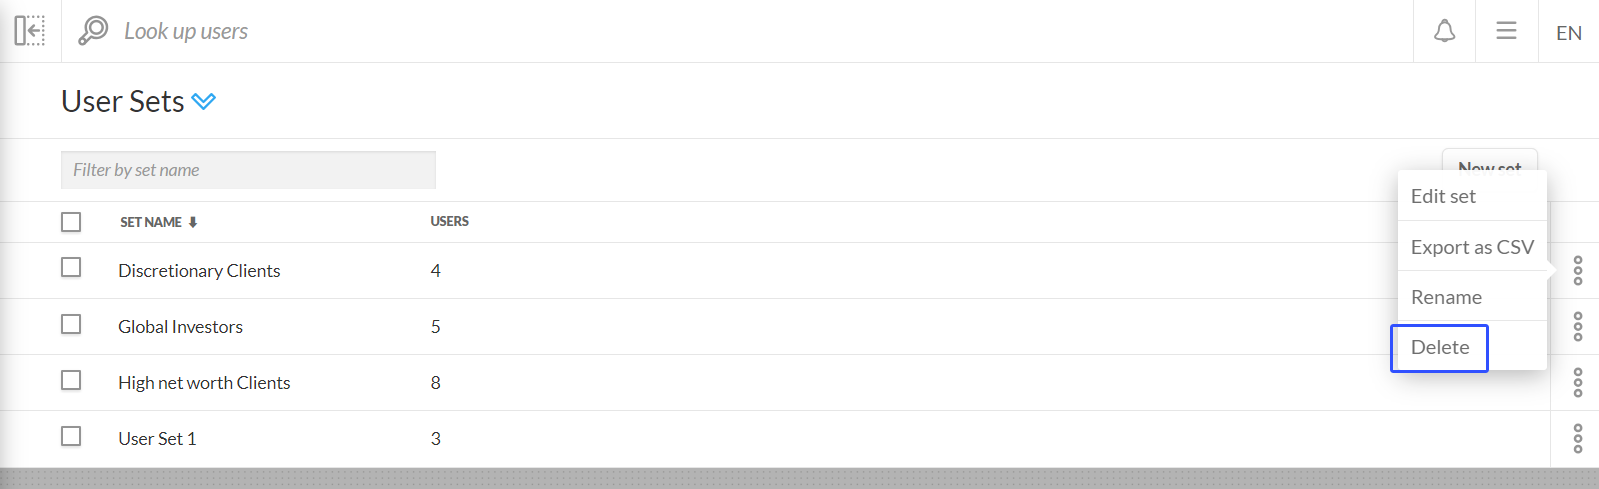
Select User Sets in the Admin Panel’s page selector to see your list of user sets.
Create a new user set
-
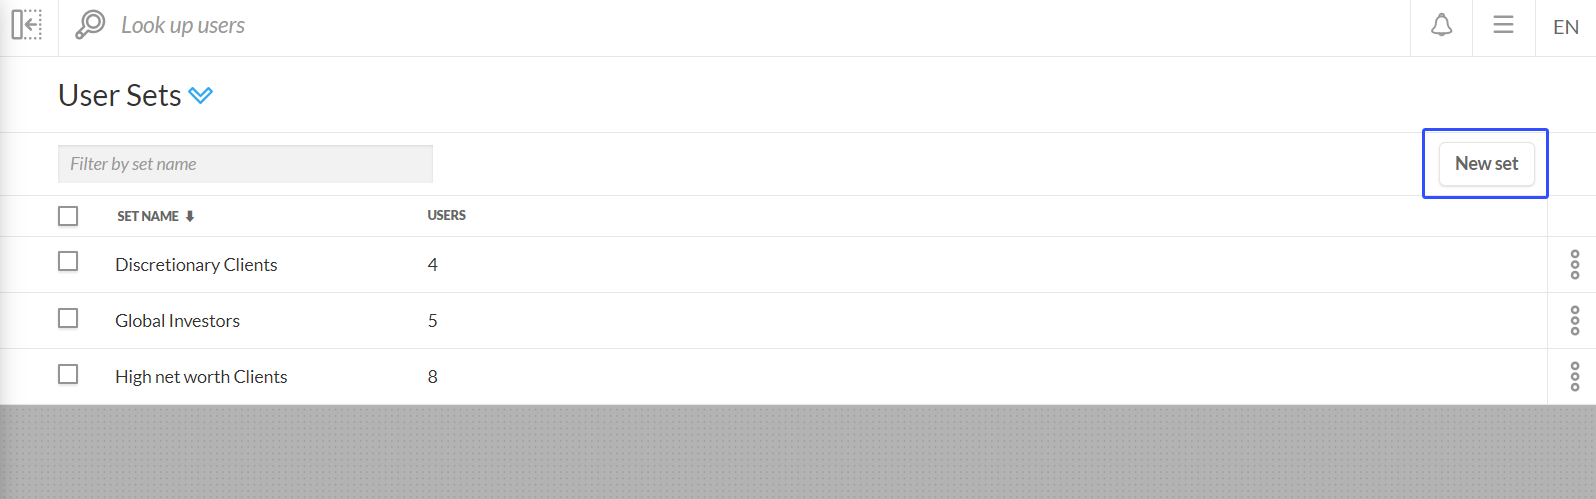
To create a new user set, click the New set button.
-
A modal appears for naming the new user set. In this example, we will use the name User Set 1.

-
Save to create this new empty user set.
-
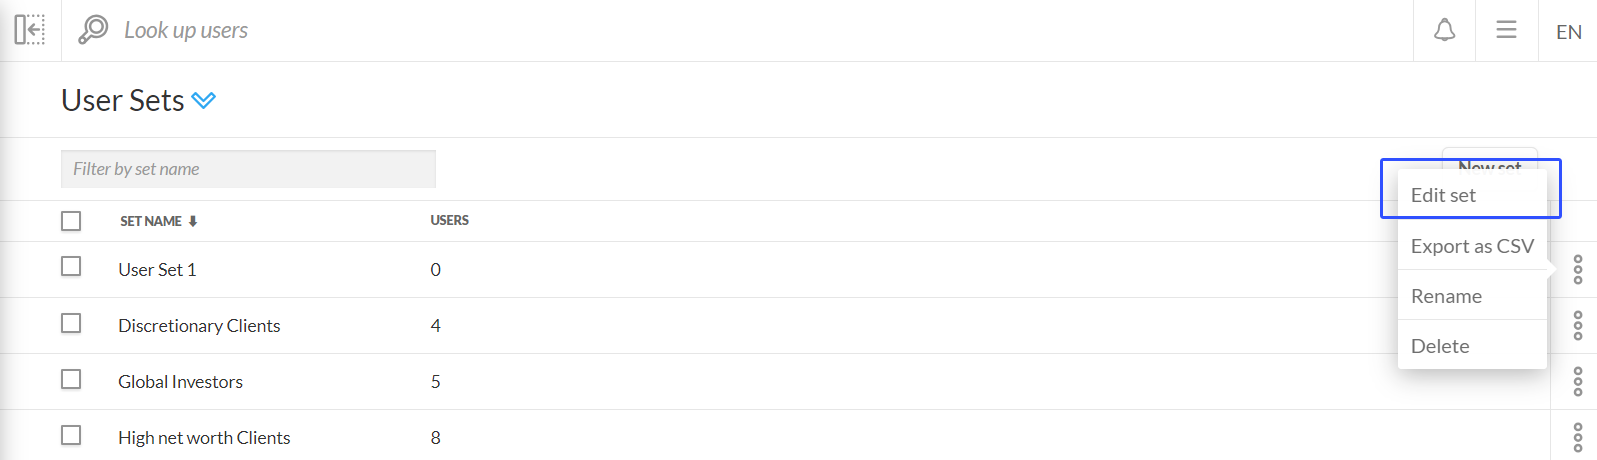
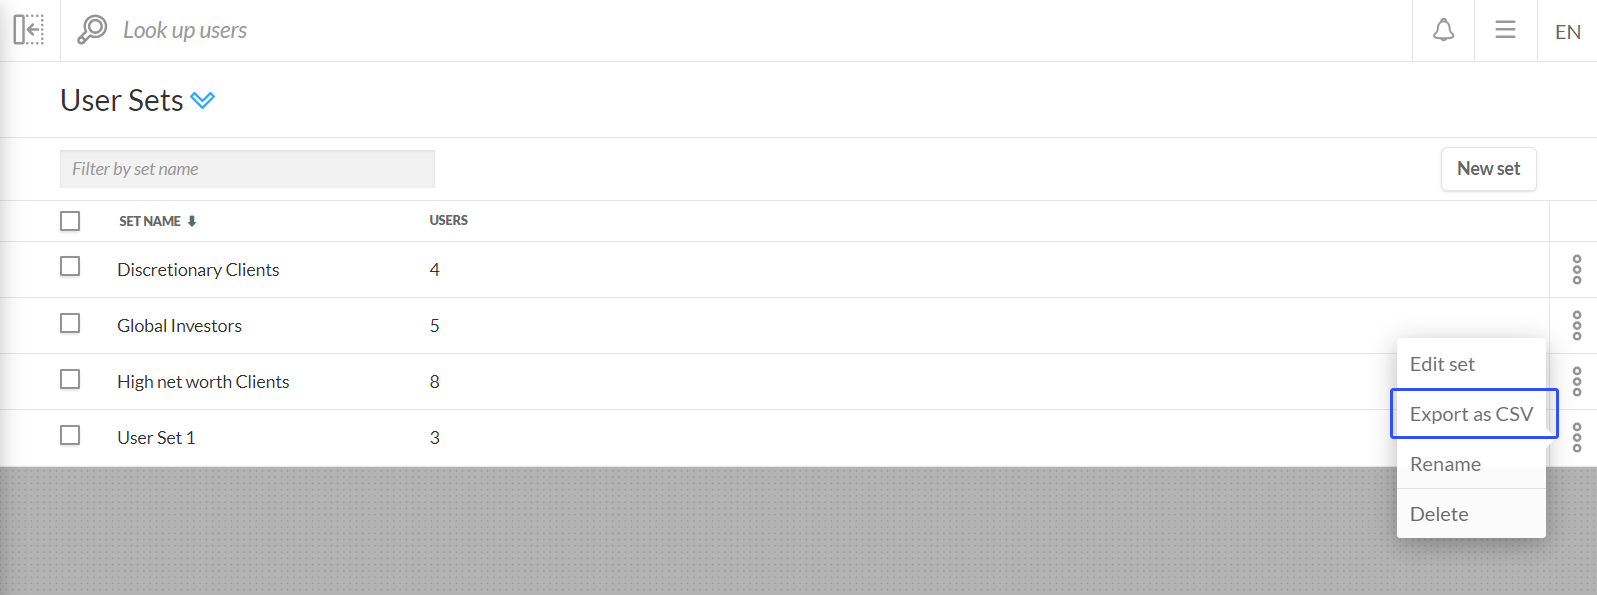
By clicking on the options button (triple-dots icon) on the right side of the page, a menu appears with 4 options:
-
Edit set
-
Export as CSV
-
Rename
-
Delete
-
-
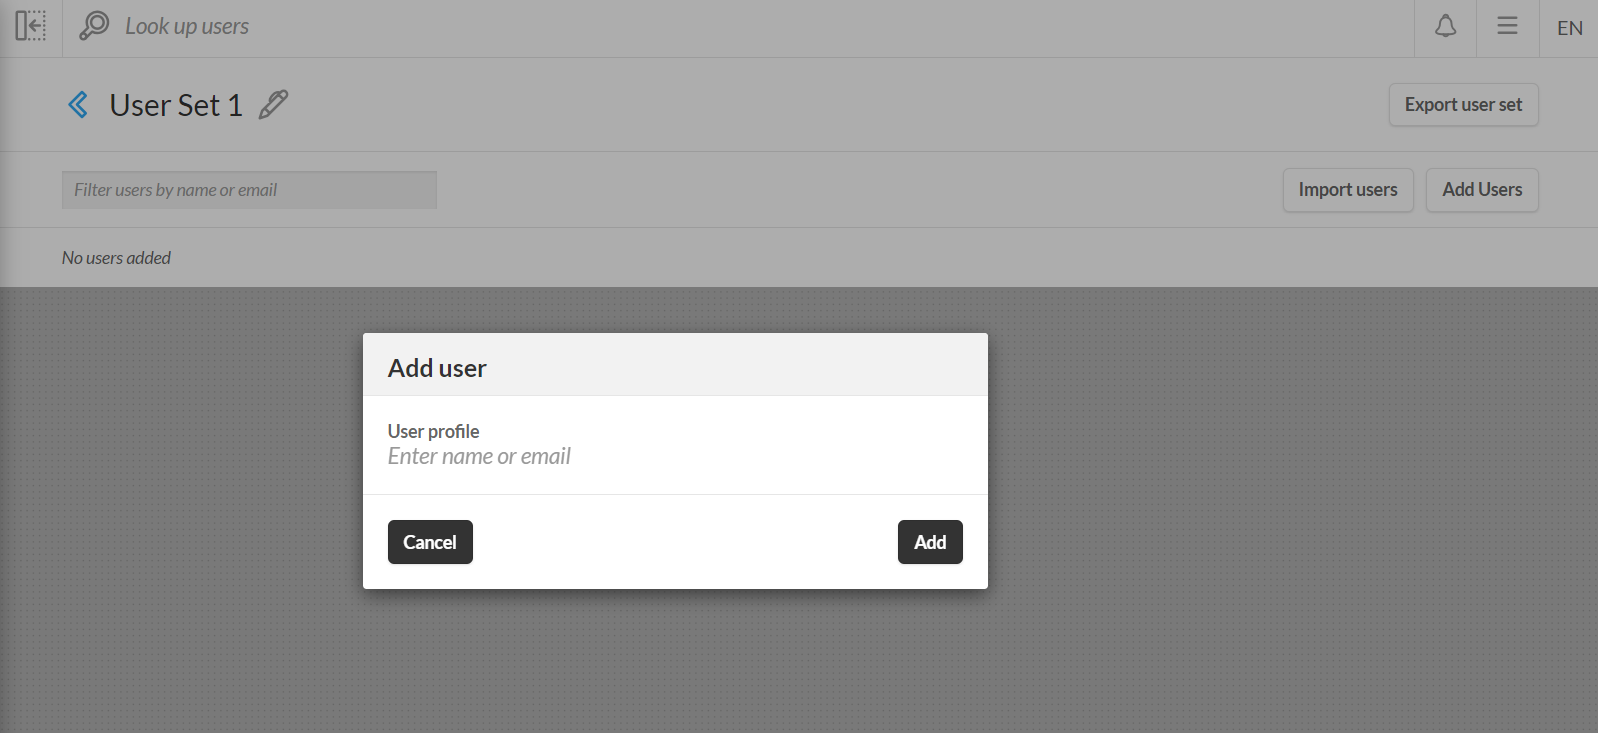
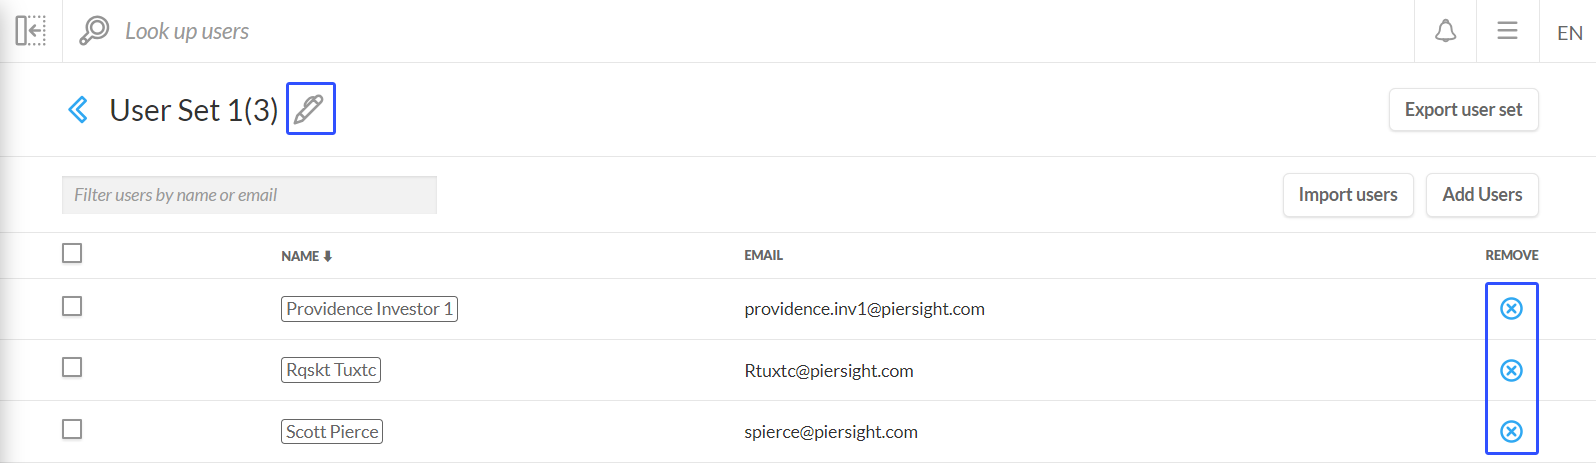
Select Edit set to enter that particular user set screen and choose the users you want to add to this user set.
-
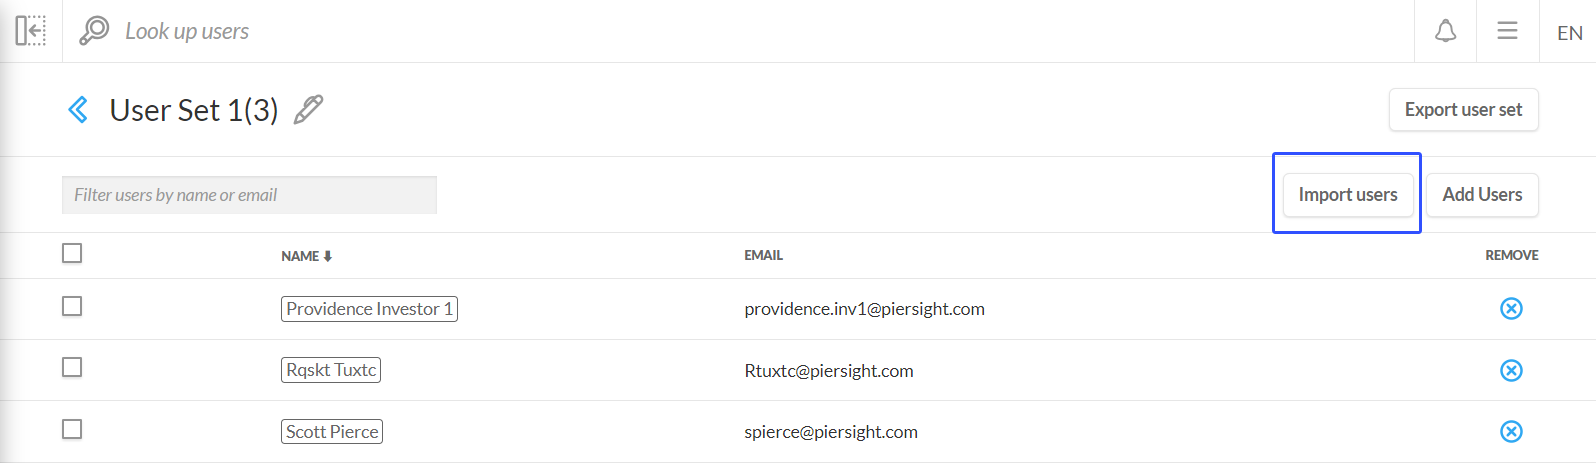
You can search for users to add by entering the name or email address of users in the ADD USERS lookup field. Select the user from the search result to add the user. Repeat this process until you have all the users you want to add to the user set. Alternatively, you can also import users by the Import users feature.
-
To return to the list of user sets, click the back (left arrow) button beside the user set name.
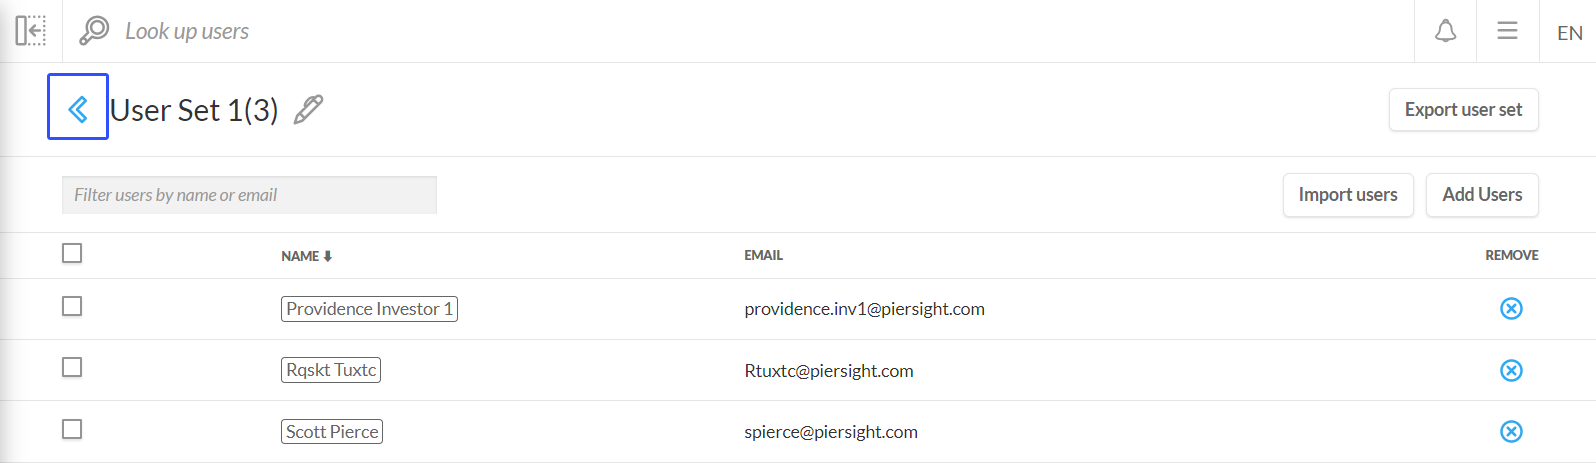
In this example, we have added 3 users and the number of users is indicated in brackets next to the user set name.
Edit an existing user set
Once a user set is created, you can modify the users of a specific user set by clicking the corresponding menu icon to review the user list. While viewing a specific user set screen, you can review the users, add more users (via the add user field), or remove users by clicking the remove icon beside their name(s). You can also rename the user set by clicking on the edit icon (pen icon) beside the user set name.
Export and import user sets
You can use the export and import user sets feature to manage and synchronize user sets as mailing or distribution lists. This functionality enables export user sets for verification against internal lists and import them for bulk update.
Export user sets
-
Select the Export as CSV option from the options menu on the main User Sets page.
-
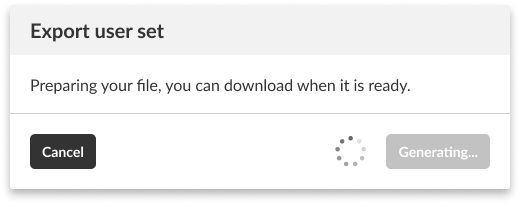
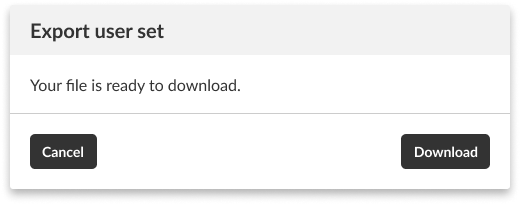
The Export user set modal will appear.
-
Client Portal would generate the user sets in CSV format.
-
When the export user sets file is ready, click the Download button on the Export user set modal to download the user sets.
Alternatively, export a user set using the Export user set button available when you edit a user set.
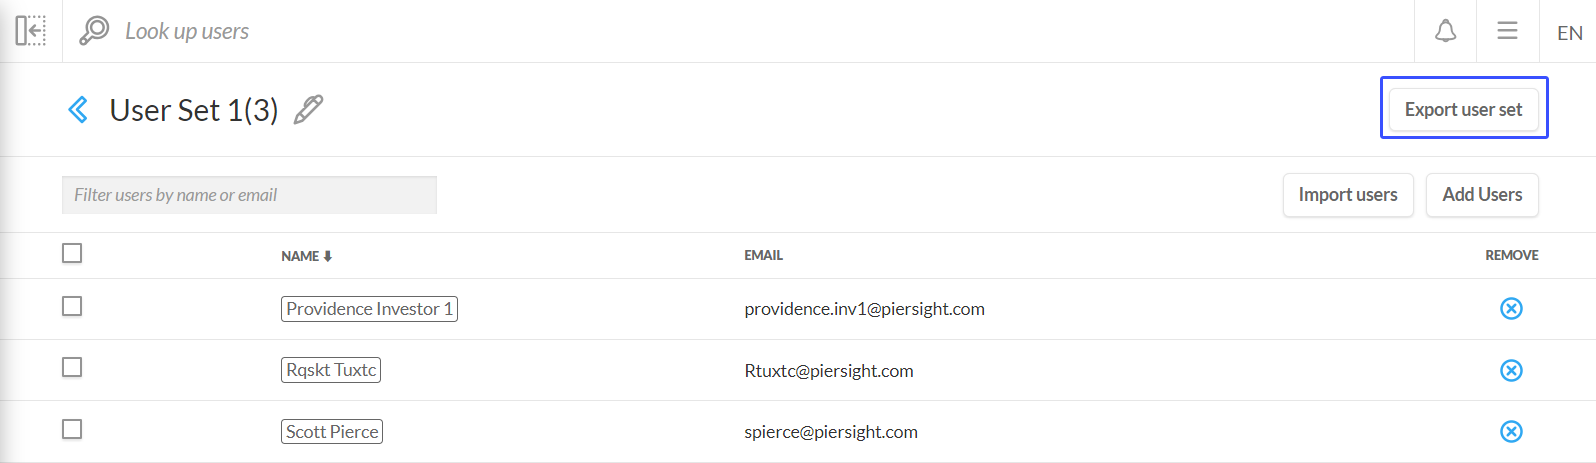
After clicking the Export user set button, the Export user set modal appears and you can download the user set in CSV file format.
Import user sets
You can import users by editing an existing user set.
-
Click the Import users button and the Import users modal will appear.
-
Instructions and template files for importing users via CSV are available by clicking the Download button on the Import users modal or downloading the file: user_set_import_enca.xlsx.
-
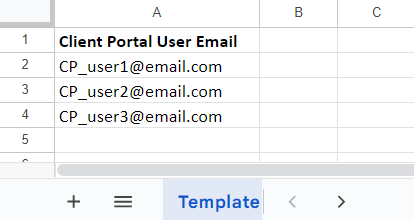
Follow the instructions to prepare your user set template.
-
Create a spreadsheet where cell A1 has the title of: Client Portal User Email
-
List all the email addresses you want to import (email addresses must be existing users' in the Client Portal).
-
Save the file in CSV file format.
-
Note: Imported users are added to the user set and do not overwrite the existing users in the user set.
-
-
-
Click the paper clip icon to upload your user set in CSV file format.

-
When Client Portal finishes scanning the uploaded file, click the Complete import button.

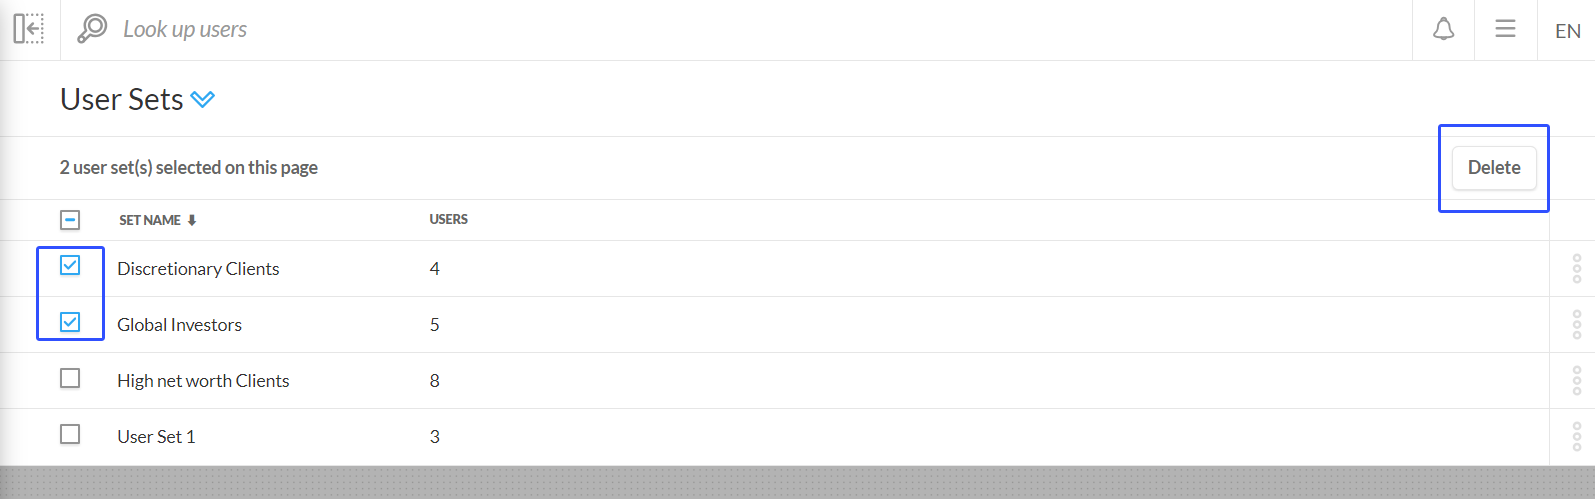
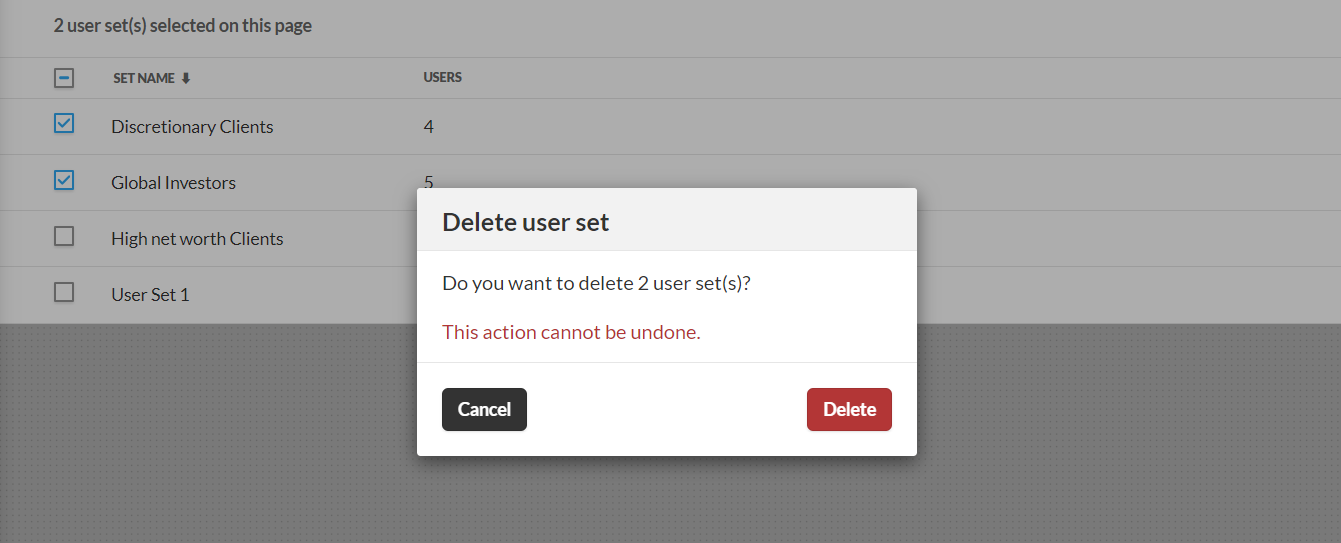
Delete user set(s)
On the main User Sets page, a user set can be deleted via the user set’s options menu, select the delete option. A modal appears for you to confirm deleting this user set.
You can also select all or select multiple user sets to perform a bulk deletion of user sets by checking the corresponding checkboxes.