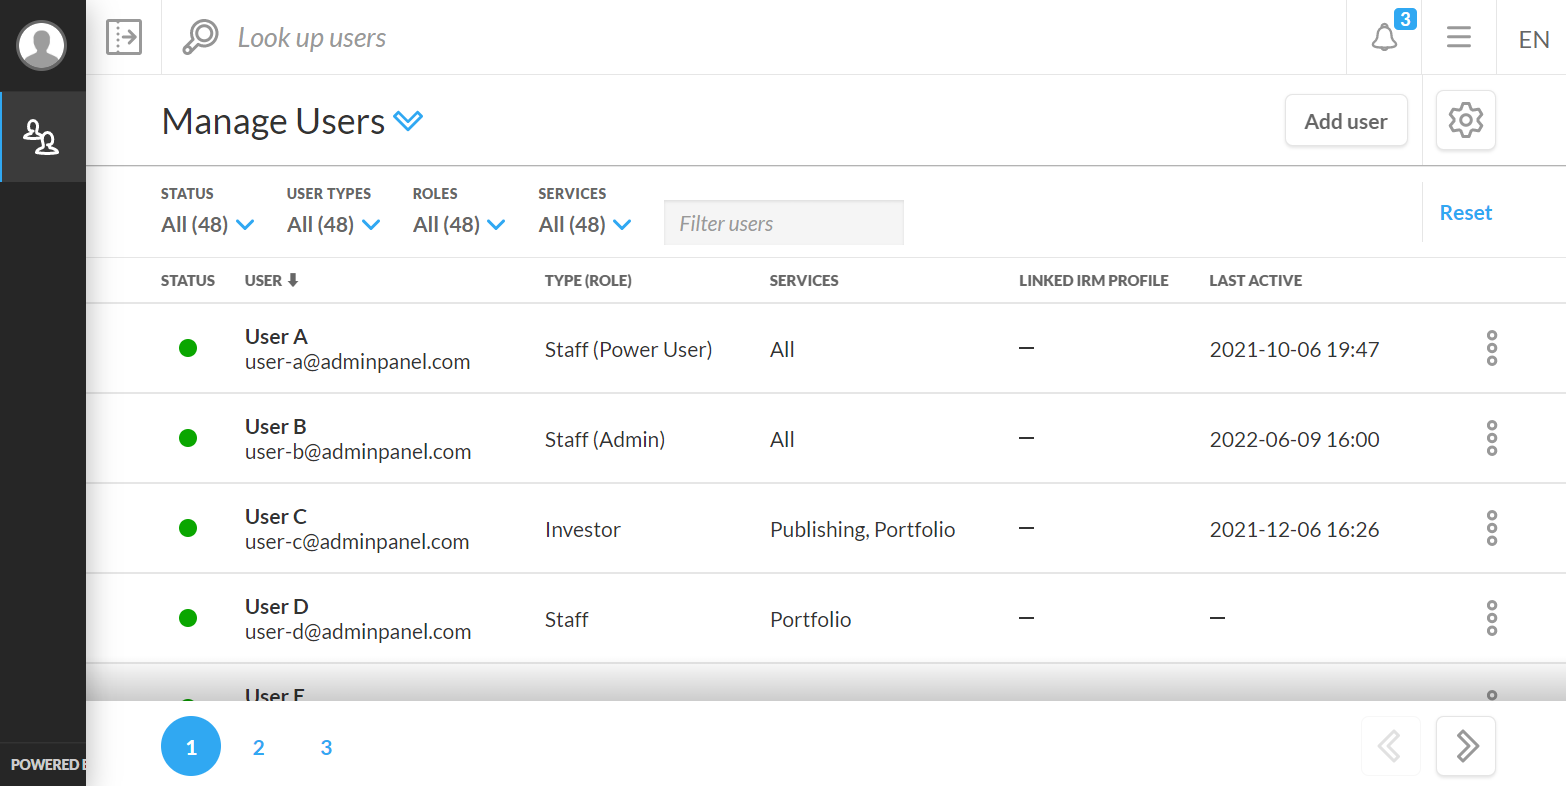
The header of the Manage Users page includes the Add User button which allows you to create new users and set their permissions.
By selecting the Add User button, you open a modal where you can fill in the necessary details to setup a new user:
-
First name
-
Last name
-
User type
-
Investor - a client who can view information relevant to an account they hold or documents published to them
-
Staff - users who manage accounts, account groups
-
-
Role - select a role for the user to indicate their level of permissions (only available for staff user types)
-
Staff - users will only have access to Portfolio and/or Publishing services
-
Power User - users will have limited access to the Admin Panel service in addition to Portfolio and/or Publishing services
-
Admin - users will have full access to all services (Admin Panel, Portfolio, and Publishing) for all accounts in their application environment
-
-
Read-only - when checked, it will prevent the user from publishing documents and saving any changes to their Client Portal Platform
-
The user will still have the ability to download documents and view services, features, and tools on Client Portal
-
When you enable Read-only you can safely sign in as that user to check their permissions and account access without the risk of making changes
-
This function is not applicable to admin user accounts
-
-
Email
-
Default language – the language that Client Portal will use to display information after the user signs in (users can change setting in Language Preferences)
Set up security settings
Select one of two options for the new user's first sign-in:
Set password:
Set a password the user will need to sign in for the first time (a default setting to require users to change their password on their next sign-in will be on by default).
-
Passwords must meet the minimum requirement of Secure to be accepted.
-
There is a Generate button that will create a random password for the user.
-
This option will fill both the Password and Re-type password fields, so be sure to make note of the generated password.
-
Require password change upon next sign-in - when checked, the user will be required to change their password on their next successful sign-in. This setting will revert to unchecked after the user changes their password.
Send invitation email:
Do not set a password and invite the new user to the application as a "Staged user".
-
A “staged” user will be created rather than an “Active” user when the Next, set up accounts button is selected.
-
Select when you would like to send the invitation email to staged users.
-
User access through the invitation email link will only be active for 48 hours from when it is sent.
After you set these attributes for a user you can choose which accounts and account groups this user can view by clicking the Next, set up accounts button at the bottom of the modal.
Set up accounts
From the Manage Account Access modal, you can enter the name or code of the accounts you want a user to have access to under the Accounts/Groups field. If you would like to give a user access to all accounts, click the checkmark next to All accounts (option only available for staff-type users). The dropdown list that appears when you enter characters in the Accounts field is separated into tabs for the Accounts, Account Groups, Sets, and Set Groups.
If you would like to give a user access to an account that is within account groups, you will automatically be given user permission to access all account groups the account belongs to.
After you have selected which accounts to assign to the user, you can click Next, set up services to open the Set Up Service Access modal. Here you can choose which services and features a non-admin staff user can access in Client Portal.
Set up services
From the Set up Services modal, you can manage a non-admin staff user's permissions for the Publishing Service. You can adjust permissions by clicking the appropriate checkmark.
The permissions you can give users include:
-
Manage own documents
-
Publish, view, rollback, delete, and open single-file publications and other related documents
-
-
View others' documents
-
View single-file published documents created by other staff-users
-
-
Manage other's documents (requires View others' documents to be enabled)
-
Edit, rollback, delete, and open single-file publications and related documents created by other staff users
-
-
Create, view, edit, and delete all documents, including those published by other staff users
-
Manage own mass publications
-
Publish, view, rollback, delete, and open mass publications and related documents
-
-
View others' mass publications
-
View mass-published documents created by other staff-users
Manage other's mass publications (requires View others' mass publications to be enabled)
-
Edit, rollback, delete, and open mass publications and related documents created by other staff users
-
-
After you have set permissions for the user, you can click the Done button to save your settings. The new users will appear in the User List.